
How to evaluate outdoor kitchen configurator software in a live demo
Evaluate outdoor kitchen configurator software with a practical demo checklist for cabinet modules, layout changes, appliance access and a clear sales handover.
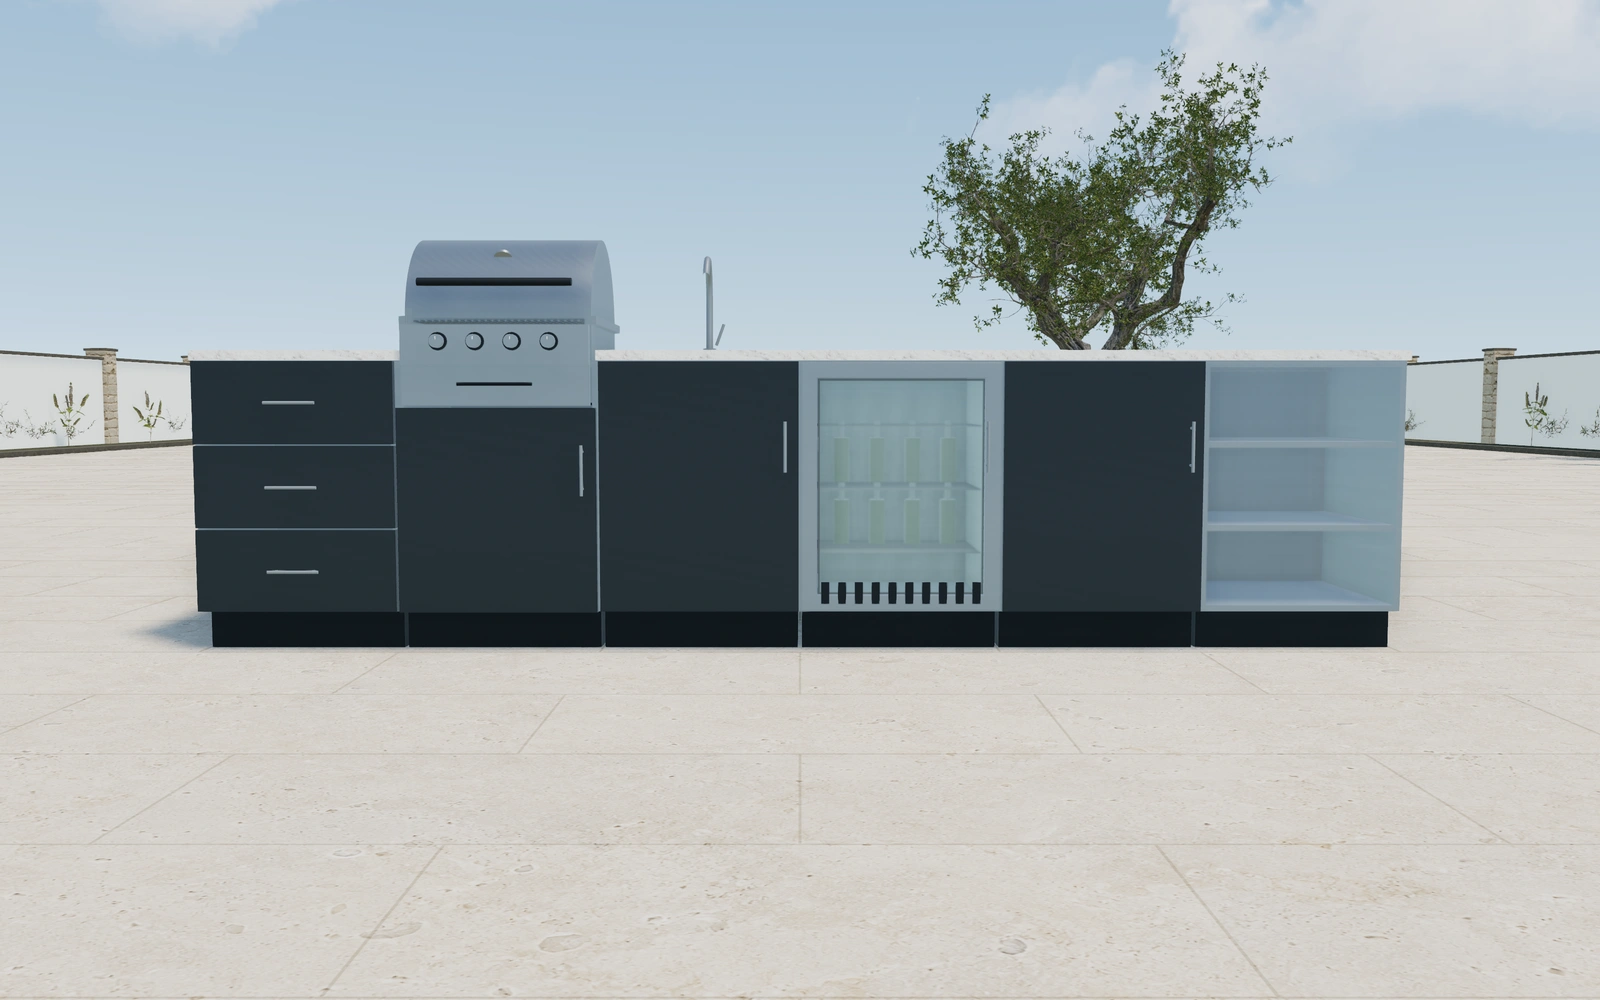
Evaluate one customer brief through cabinet edits, layout changes and the commercial handover.
Start with one customer brief, then ask for an unprepared change
The most revealing outdoor kitchen configurator demo starts with a cabinet list and ends with a changed cabinet list. Ask the provider to add a drawer cabinet, a barbecue cabinet, a sink cabinet and a beverage refrigerator, then move one of them. Next, change the arrangement and review the resulting specification. This tests whether the software can support your sales conversation when a buyer changes their mind.
A beautiful fixed scene answers a different question from an editable product. If you sell modular outdoor kitchens, evaluate the software against the decisions your team actually handles. The cabinet model should explain what occupies each position, which module size was chosen, what changes when a unit moves and which installation questions still require a product specialist. Those answers matter more than a long list of presentation effects.
Sales Visualizer’s outdoor kitchen configurator offers a concrete starting point for this evaluation. Its cabinet builder includes storage, drawers, a sink, barbecue, refrigeration and open preparation shelves. Use the following sequence to assess the workflow against your own range, rather than treating the starting configuration as the final specification.
Test 1 — replace a cabinet instead of stretching the whole kitchen
Begin with individual cabinet modules. In the current Sales Visualizer module catalogue, a base cupboard can be selected at 300, 450, 600, 800 or 900 mm, while a barbecue cabinet has 900 and 1200 mm options. A beverage refrigerator module is 600 mm wide. These are the current selectable model sizes. Your supplier’s actual cabinetry and appliance specifications should define the range used in a commercial rollout.
Ask the demonstrator to replace a 600 mm cupboard with a 900 mm drawer cabinet while keeping the appliance choices identifiable. Observe the neighbouring units and the updated arrangement. A useful result makes the selected cabinet and its width clear. A generic overall-width slider cannot tell a salesperson which additional cabinet capacity the customer has bought.
Then ask how your own module sizes would be represented. Bring a short supplier list covering a standard cupboard, a drawer unit, a sink unit and an appliance housing. Ask which are ready-made choices, which require product setup and how that work is agreed. This turns an abstract discussion about customisation into a review of actual product data.
Test 2 — add, reorder, duplicate and remove units
A cabinet builder needs to handle ordinary revisions without forcing the salesperson to start again. In Sales Visualizer, the outdoor kitchen controls support adding modules, changing their sequence, duplicating units and removing them. During the demo, use those actions in the same order a customer might request them. Add preparation storage, move it beside the cooking area, duplicate the preferred storage module and remove the duplicate.
Watch the selected cabinet as well as the complete kitchen. A change that leaves the screen looking plausible can still be difficult to explain if the selection jumps to another unit or the module labels become unclear. Ask the demonstrator to identify the same drawer cabinet after reordering and show its selected specification. The team should be able to discuss that unit without relying on its old position in a screenshot.
Include the least glamorous edit in the test. Removing a cabinet should leave an understandable arrangement and a clear next decision. If the requested sequence is unsuitable, ask how the interface communicates that and how the salesperson recovers. Record the behaviour you see, rather than assuming that every possible cabinet combination is supported.
Test 3 — change the shape while tracking the same requirements
The current outdoor kitchen builder supports straight, L-shaped and U-shaped arrangements. These are useful alternatives when the brief changes from a long wall run to a return or a more enclosed working area. Ask for the shape change after building the cabinet sequence, and keep a written list of the required cooking, washing, refrigeration and storage functions beside the screen.
The evaluation is whether those requirements remain understandable through the change. Review where the return begins, which units sit on each run and how the corner is represented. Do not judge a straight run and a U-shaped version solely by their outside silhouette. A corner can change how the kitchen is approached and how the adjacent cabinets are discussed.
For a fair comparison, leave finishes unchanged during this step. First decide whether the arrangement communicates the customer’s functional brief. Then discuss colour and worktop appearance. This sequence helps your team separate a layout decision from a finish preference and gives the provider a repeatable test to perform with your product specialist.
Test 4 — inspect openings and finishes as separate decisions
Ask to inspect a storage opening and an appliance opening, rather than requesting a single camera orbit. Sales Visualizer exposes appropriate door, drawer and barbecue hood or refrigerator opening controls for the selected module. These views help the buyer understand the cabinet being discussed. They also give the salesperson a reason to check nearby units and the relationship between equipment and preparation space.
An opening animation is a visual review aid. It does not establish that an actual appliance meets its manufacturer’s clearance, ventilation or connection requirements. During procurement, ask where your team will record the exact appliance reference and the questions that need a supplier or installer’s answer. A demonstrator who can explain that boundary gives you a more usable sales workflow.
Test the surfaces independently. The outdoor kitchen includes graphite and sage powder-coat appearances, brushed stainless steel and a warm timber appearance for fronts, plus separate worktop and hardware choices. Change one surface at a time and ask the demonstrator to name what changed. A clear visual specification preserves component identity instead of treating every visible material as one global colour.
Test 5 — examine the handover beyond the 3D scene
Ask what the salesperson can hand over after the customer has chosen a preferred arrangement. In a modular kitchen discussion, that handover should identify the cabinet sequence, chosen modules, arrangement and finishes. It should also distinguish the visual configuration from installation services and any equipment that still needs confirmation. Ask to see how the actual workflow represents those distinctions.
Sales Visualizer connects its product experience with customer projects, proposals and orders. For your evaluation, request a demonstration that follows one named customer project through the relevant steps. Keep the configuration review and the commercial review connected, but inspect each output. A good-looking 3D screen alone does not show whether your staff will have a clear proposal to discuss.
Bring three potential proposal lines to the demo: the configured cabinetry, the selected appliance supply and the site-specific work. Ask the provider to demonstrate which parts your team enters and which product details are carried into the workflow. Review the resulting document before deciding whether the setup matches your business. For the broader process, explore the Sales Visualizer product and CRM workflow.
Compare software providers against observable outcomes
Use the same brief with each provider and mark each task as demonstrated, partly demonstrated or still to confirm. Cabinet-level editing, a clear shape change, readable option labels and an inspectable handover should each receive their own assessment. Avoid combining everything into a single impression of visual quality. The strongest choice for your business is the one that handles your actual product decisions clearly.
Ask the demonstrator to repeat the essential edit on a phone-sized screen. The important question is whether a salesperson or customer can find the selected cabinet, make the change and understand the outcome. Do not require a small screen to show every panel at once. Look for a usable sequence of selection, change and review, with the product still visible when it matters.
Finally, discuss the scope of launch. Separate a shared configurator starting point from work on your own cabinetry, appliance models, finish references and document requirements. Use the current Sales Visualizer plans to review included users and configurator choices, then confirm any customer-specific setup in the onboarding discussion. This keeps the demonstration tied to a practical buying decision.
Frequently asked questions
What is the difference between a 3D outdoor kitchen viewer and a configurator? A viewer shows a model. A configurator lets the user change specified product choices and review the result. For modular kitchens, test cabinet selection, module sizes and sequence changes instead of assuming that a rotating model includes those functions.
Can I test the workflow before bringing my entire catalogue? Yes. Start with a small, representative list of cabinet and appliance requirements. Include one ordinary revision and one awkward change. This gives the provider a useful brief while keeping the evaluation focused. A full supplier range can be reviewed separately during setup.
Should a kitchen configurator use one overall dimension? For a modular range, individual cabinet dimensions explain the specification more clearly. The final arrangement follows the selected modules and connections. Bespoke cabinetry may need a different dimension policy, so ask the provider to demonstrate your actual approach rather than applying one rule to every kitchen business.
Does the rendered barbecue define the appliance I will supply? Only your agreed product specification can do that. Confirm the exact appliance reference, what is included in supply and which installation questions remain open. Use the model to discuss the choice, then ensure the commercial description identifies the equipment being quoted.
A demo brief for an outdoor kitchen dealer
Suppose a customer wants barbecue cooking, washing, cold drinks and accessible storage beside an existing terrace. Start by asking for a 600 mm drawer module, a 900 mm barbecue module, a 600 mm sink module and a 600 mm beverage refrigerator module. Then request a return and an additional storage cabinet. Treat this as an evaluation exercise, with the actual product and site specification reviewed separately.
- Ask which modules changed position when the return was introduced.
- Replace the drawer cabinet with a wider catalogue option and inspect the neighbours.
- Open the relevant drawer, door and appliance views.
- Review which chosen items and unresolved installation questions reach the sales handover.
Your review list.
- Evaluate one customer brief through cabinet edits, layout changes and the commercial handover.
- Identify each module and its selected size after reordering.
- Inspect corners and openings before refining the finishes.
- Confirm actual appliance references and supplier requirements.
- Review launch scope, user access and the current subscription plan.
See the next step
in Sales Visualizer.
Bring a short cabinet list and one customer brief. Ask us to demonstrate the module changes, compare the arrangement and review your sales handover.
Request an outdoor kitchen demo